esp32 on QEMU
Not having the entire hardware for embedded projects is a pain. It stops the development entirely and is extremely inefficient. In traditional software dev - development, testing and deployment are 3 entirely different phases which are…
Not having the entire hardware for embedded projects is a pain. It stops the development entirely and is extremely inefficient. In traditional software dev - development, testing and deployment are 3 entirely different phases which are mostly independant of each other. Eventhough software development methodologies such as iterative development, agile development, rapid prototyping exist however the waterfall model is intuitive and is commonly used while building projects.
Embedded development (atleast for non-industry grade projects) requires development and testing to happen side by side to ensure what you're building works!
Now you cannot really always have the hardware on hand, which makes development tricky. We faced a similar problem during the development of our flight software for our newest rocket Airavata at Team Sammard. The development timelines of the flight computer and flight software run paralelly which means for a majority chunk of the time we do not have access to the hardware on which our code will run. This means we can write our code but not really test it. I took this to reddit to search for solutions where I was suggested to simply buy the components and make the flight computer on a breadboard and be done with it. One can argue that the components do not cost that much to begin with and buying them to save time would make sense. However since I come from a pure software background I wanted a solution which not only solved my current problem but also gave me more.
The Plan!
So the plan was to create a custom flight computer emulator, which would behave exactly how the real flight computer would behave. This means that not only the microcontroller will be virtualized but also the sensors, storage, actuators, etc. In theory since we are virtualizing the sensors we can have them return any data we'd like which means we can write tests and ahve the sensors return data based on the tests which will allow us to see how oour flight software is performing in those situations. This particular approach is better than building the flight computer on a breadboard as here we can test the behaviour of the flight software in situations such as reaching the highest point in flight to check for parachute ejection. Which is a very risky test to perform with real hardware as it has the risk of damaging the hardware.
Prerequisites
`I will strongly recommend using Linux for this. Not that this is not possible on Windows but it is just far more easier on linux.
1. ESP-IDF
Our flight computer is powered by the esp32 by espressif. Run the following commands to isntall and setup ESP-IDF.
mkdir -p ~/esp
cd ~/esp
git clone --recursive https://github.com/espressif/esp-idf.git
cd esp-idf
./install.sh
This will install all necessary tools.
2. Set Up Environment Variables
Once the installation is complete, you need to load the environment variables:
source ~/esp/esp-idf/export.shNow try running:
idf.py --version3. Make It Permanent
To avoid running source ~/esp/esp-idf/export.sh every time, add it to your shell configuration:
echo 'source ~/esp/esp-idf/export.sh' >> ~/.bashrcThen restart your terminal and check again.
4. Install Required Dependancies
Before installing QEMU, install the necessary system libraries:
sudo apt-get install -y libgcrypt20 libglib2.0-0 libpixman-1-0 libsdl2-2.0-0 libslirp02. Install the ESP32 QEMU Emulator
Run the following command to install the pre-built QEMU binaries:
python $IDF_PATH/tools/idf_tools.py install qemu-xtensa qemu-riscv32If $IDF_PATH is not set, try:
python ~/esp/esp-idf/tools/idf_tools.py install qemu-xtensa qemu-riscv32After installation, make sure QEMU is added to your PATH:
source ~/esp/esp-idf/export.shTo verify, check the installed tools:
python $IDF_PATH/tools/idf_tools.py listYou should see qemu-xtensa and qemu-riscv32 in the list.
Run a Sample ESP32 Application in QEMU
Now that QEMU is installed, let's run a test application:
1. Create a New ESP-IDF Project
cd ~/esp
idf.py create-project hello_world
cd hello_world
2. Configure the Project for QEMU
idf.py set-target esp323. Write Sample Code
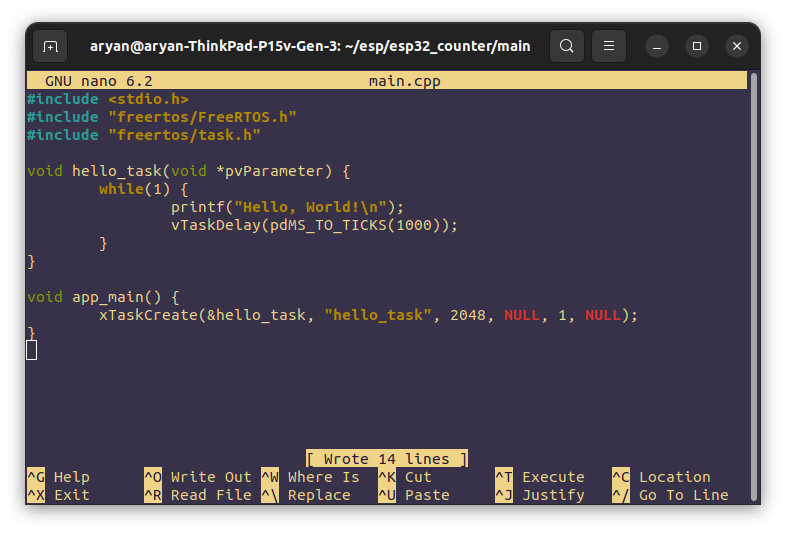
Replace the default main.c with the following code. Create or modify the file main/main.c:
#include <stdio.h>
#include "freertos/FreeRTOS.h"
#include "freertos/task.h"

void hello_task(void *pvParameter) {
    while(1) {
        printf("Hello, World!\n");
        vTaskDelay(pdMS_TO_TICKS(1000)); // Wait for 1 second
    }
}

void app_main() {
    xTaskCreate(&hello_task, "hello_task", 2048, NULL, 1, NULL);
}
4. Build the Project
Compile the project:
idf.py buildThis will generate the required firmware files.
5. Run on QEMU
Merge binaries:
esptool.py --chip esp32 merge_bin -o flash_image.bin --flash_mode dio --flash_size 4MB \
    0x1000 build/bootloader/bootloader.bin \
    0x8000 build/partition_table/partition-table.bin \
    0x10000 build/esp32_counter.bin
Run in QEMU:\
qemu-system-xtensa -nographic -machine esp32 \
-drive file=flash_image.bin,if=mtd,format=raw
In case your flash_image.bin is less than 4.0MB you will have to run:
truncate -s 4M flash_image.binverify the size of flash_image.bin using:
ls -lh flash_image.binThen re-run using QEMU. I am currently in the works of developing a custom emulator to test our flight software. The repository for which can be found here on GitHub. In case you're interested in something similar or found this cool do drop a comment below.